Escape From Tarkov “Tour” Story Chapter Guide
Every trader handover, map unlock, and Lab exploration step in the opening story chapter.

Tour is the opening story chapter in Escape from Tarkov. It starts with your escape from the tutorial version of Ground Zero, then takes you through the traders and the raids that unlock the rest of the map selection. The last stretch leads into The Lab, where you need to find three specific areas rather than simply enter the facility.
What to keep for Tour
Set these items aside as you progress so you do not sell something you will need for the next handover.

- 250,000 Roubles for Therapist.
- Five Found in Raid building-material items for Skier. Keep all five together for the handover.
- Two Found in Raid weapons for Mechanic.
- Five PMC dogtags for Prapor.
- 8,000 Dollars for Mechanic.
- A TerraGroup Labs access keycard for the transit into The Lab.
The building materials and weapons need the Found in Raid checkmark. Cash does not, and the dogtags do not have to come from PMCs you killed yourself.
Escape Ground Zero
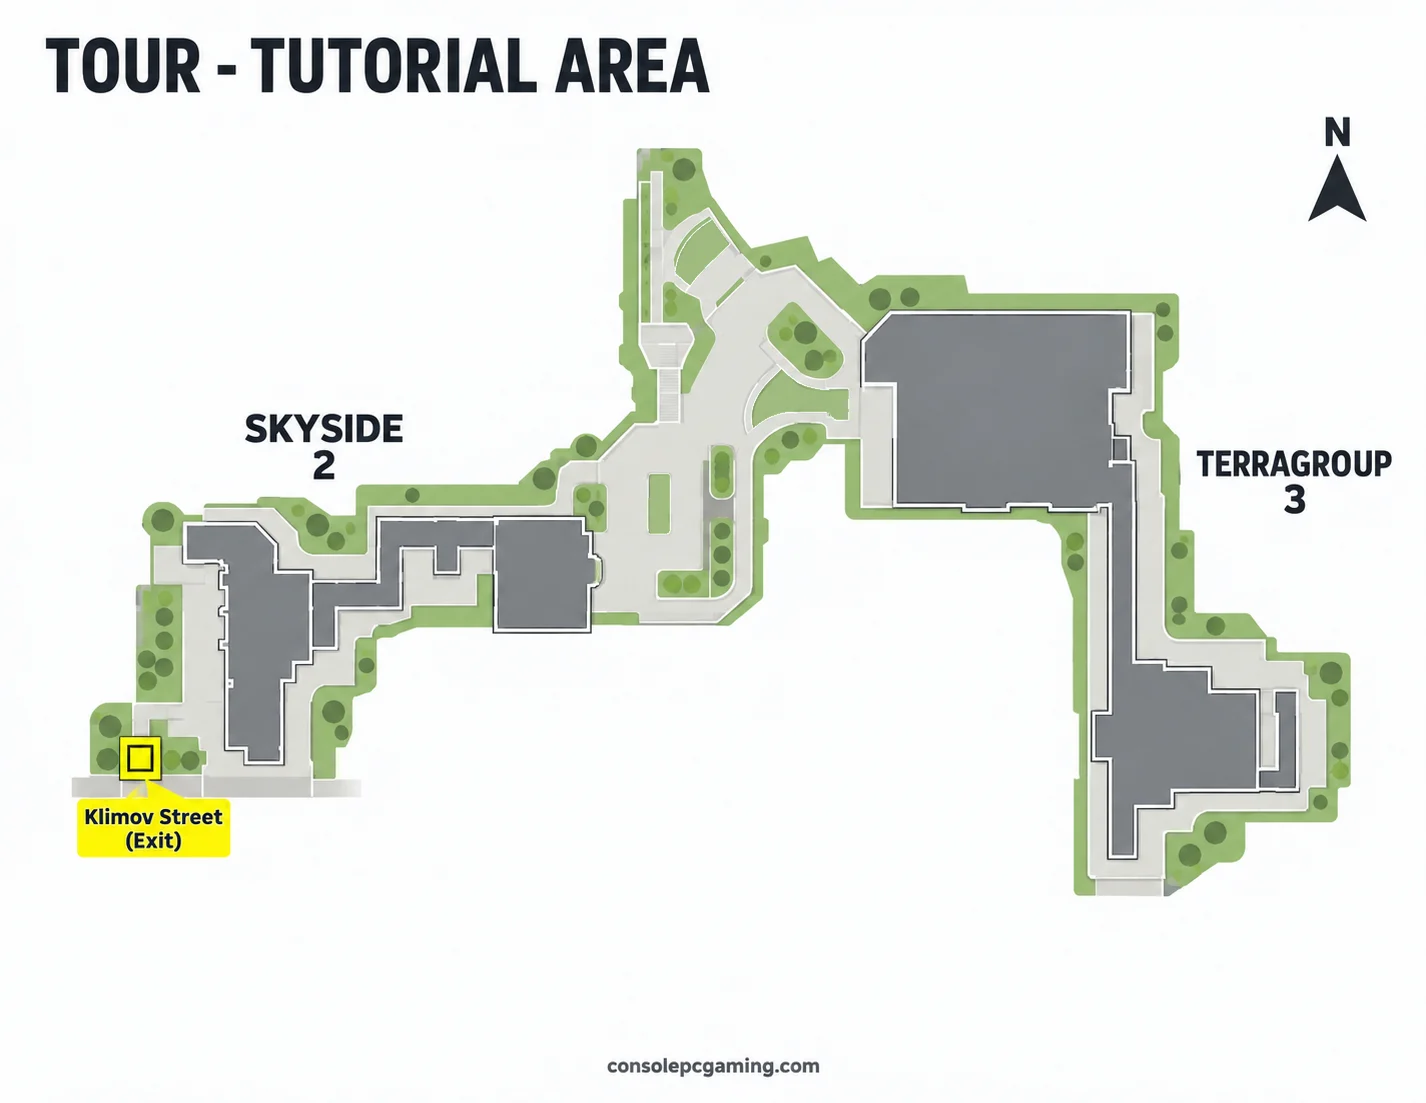
Tour begins automatically when you start the game. In the tutorial raid, work your way out of the TerraGroup building and head toward the Skyside business center. Your exit is Klimov Street, behind Skyside.
This is the tutorial version of Ground Zero, not the green-flare extraction on the normal Streets of Tarkov map. Follow the extraction route rather than looking for a flare. The control and equipment prompts introduce the game, but completing every tutorial hint is not a separate requirement for leaving the raid.
Pay Therapist to unlock Streets of Tarkov
After the tutorial, speak to Therapist through the trader menu. Use the story conversation and hand over 250,000 Roubles when the payment becomes available.
This opens Streets of Tarkov in the location selection. If you are short on cash, keep the payment in mind while selling spare equipment or collecting loot. You do not need Found in Raid money.
Ragman’s Interchange reconnaissance
Speak to Ragman, then go to Interchange. You can clear the reconnaissance requirement by extracting, or by visiting the location three times. A Run-Through can satisfy this map-visit step.
Return to Ragman afterward and finish the conversation about your reconnaissance. Do not stop at the raid result screen and assume the next trader is already unlocked.
This stage opens Skier and Customs.
Skier’s Customs visit and building materials
Speak to Skier and complete the Customs visit requirement. As with Interchange, extracting or making three visits can satisfy the map objective.
You also need to hand over five Found in Raid building-material items. Collect them from raids and keep the full set for Skier. The materials do not have to come from Customs, so you can gather them on another available map while preparing for this stage.
There is an important difference between the two requirements. A Run-Through may clear the visit objective, but it will not preserve Found in Raid status on ordinary loot you carried out. If you are bringing the materials home, aim for a Survived extraction.
Finishing Skier’s requirements opens Mechanic and Factory.
Mechanic’s Factory visit and weapons
Visit Mechanic through the trader menu, then complete the Factory requirement by extracting or visiting three times. Keep two Found in Raid weapons for his handover as well.
Weapons you buy from traders or the flea market will not replace the required raid-found weapons. Check the Found in Raid mark before handing anything over, particularly if your previous extraction was a Run-Through.
This stage unlocks Prapor and Woods.
Get three kills on Woods
Continue the story conversation with Skier and head to Woods. You need to eliminate three targets and satisfy the map’s extraction-or-three-visits requirement.
These are not three mandatory PMC kills. Scavs can contribute, and you do not need to complete the kills in the same raid as the extraction objective. Check both objectives before returning to Skier.
Finishing this part opens Peacekeeper and Shoreline.
Find the Terminal entrance and contact the garrison
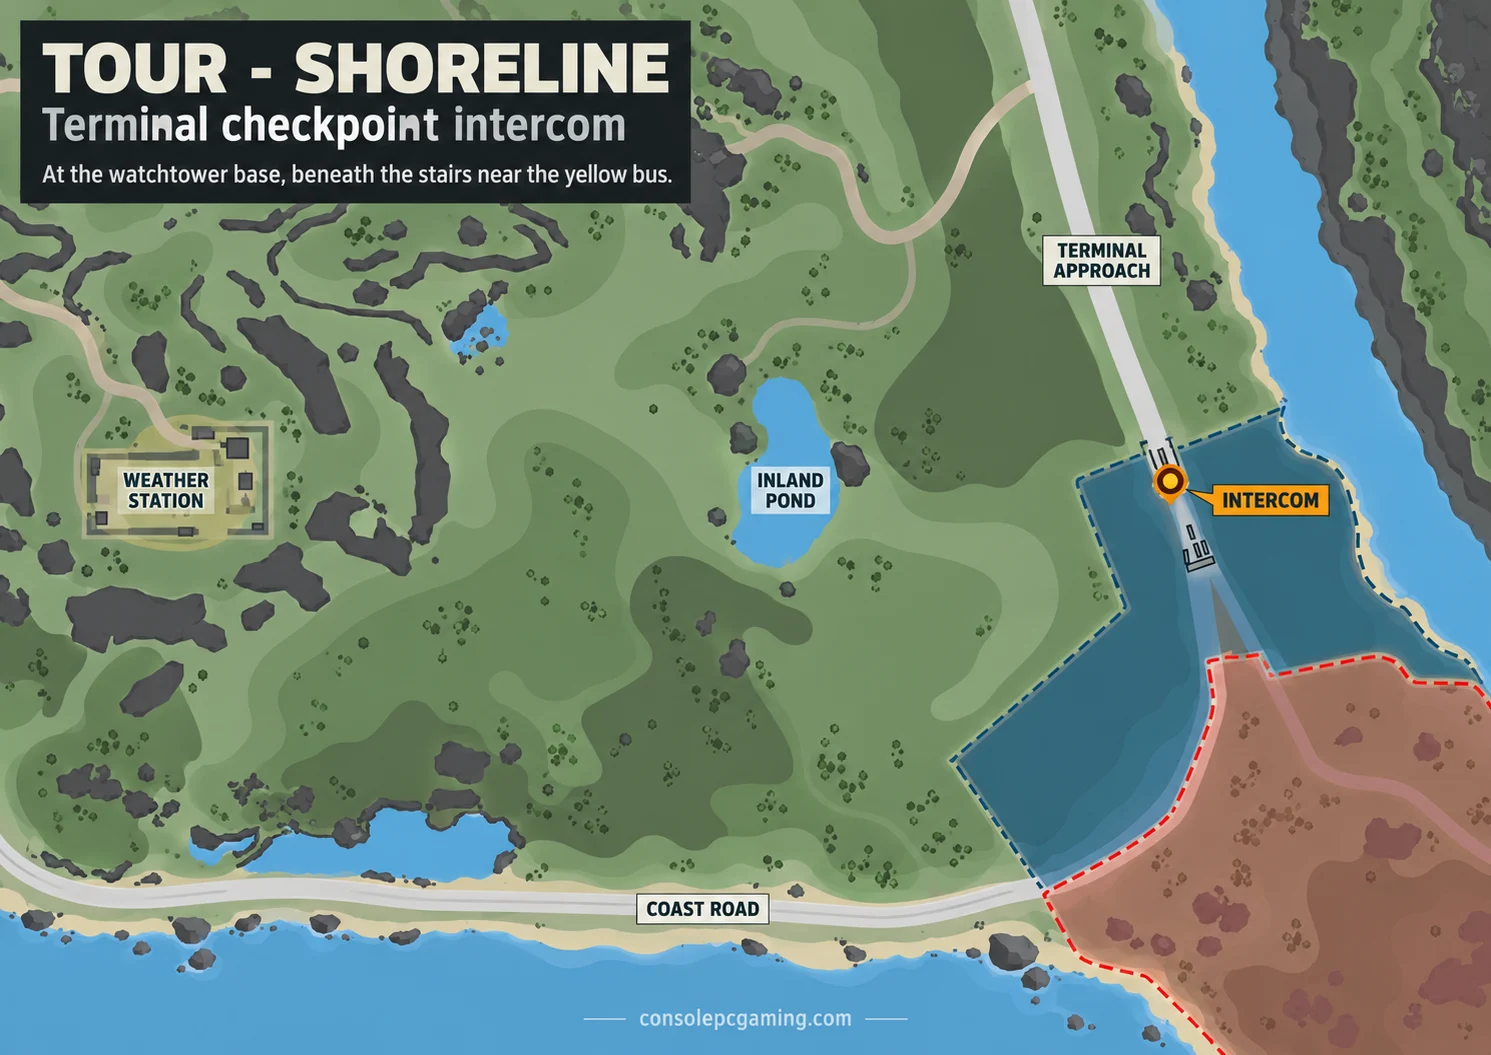
On Shoreline, head to the southeastern port checkpoint. Find the watchtower in front of Terminal and interact with the intercom there to contact the soldiers.
Stay on the approach side of the checkpoint. The garrison can kill you if you push toward the Terminal wall, and repeatedly using the intercom after being told to leave is dangerous. You are scouting the entrance at this stage, not forcing your way into the final map.
After the garrison conversation, continue the trader conversations about escaping Tarkov and work through the remaining map-access objectives. Tour does not end with a successful Terminal escape. That comes much later in The Ticket.
Unlock Reserve through Prapor
Complete the Shoreline extraction-or-three-visits objective, then return to Prapor with five PMC dogtags.
You can take these from dead PMCs without having killed those players yourself. Hand the dogtags over through the story dialogue to unlock Reserve.
Pay Mechanic to unlock Lighthouse
Speak to Mechanic and hand over 8,000 Dollars through the story conversation. Peacekeeper can exchange Roubles for Dollars if you need to make up the amount.
This payment unlocks Lighthouse. It is separate from Therapist’s earlier payment for Streets of Tarkov.
Enter The Lab through a transit
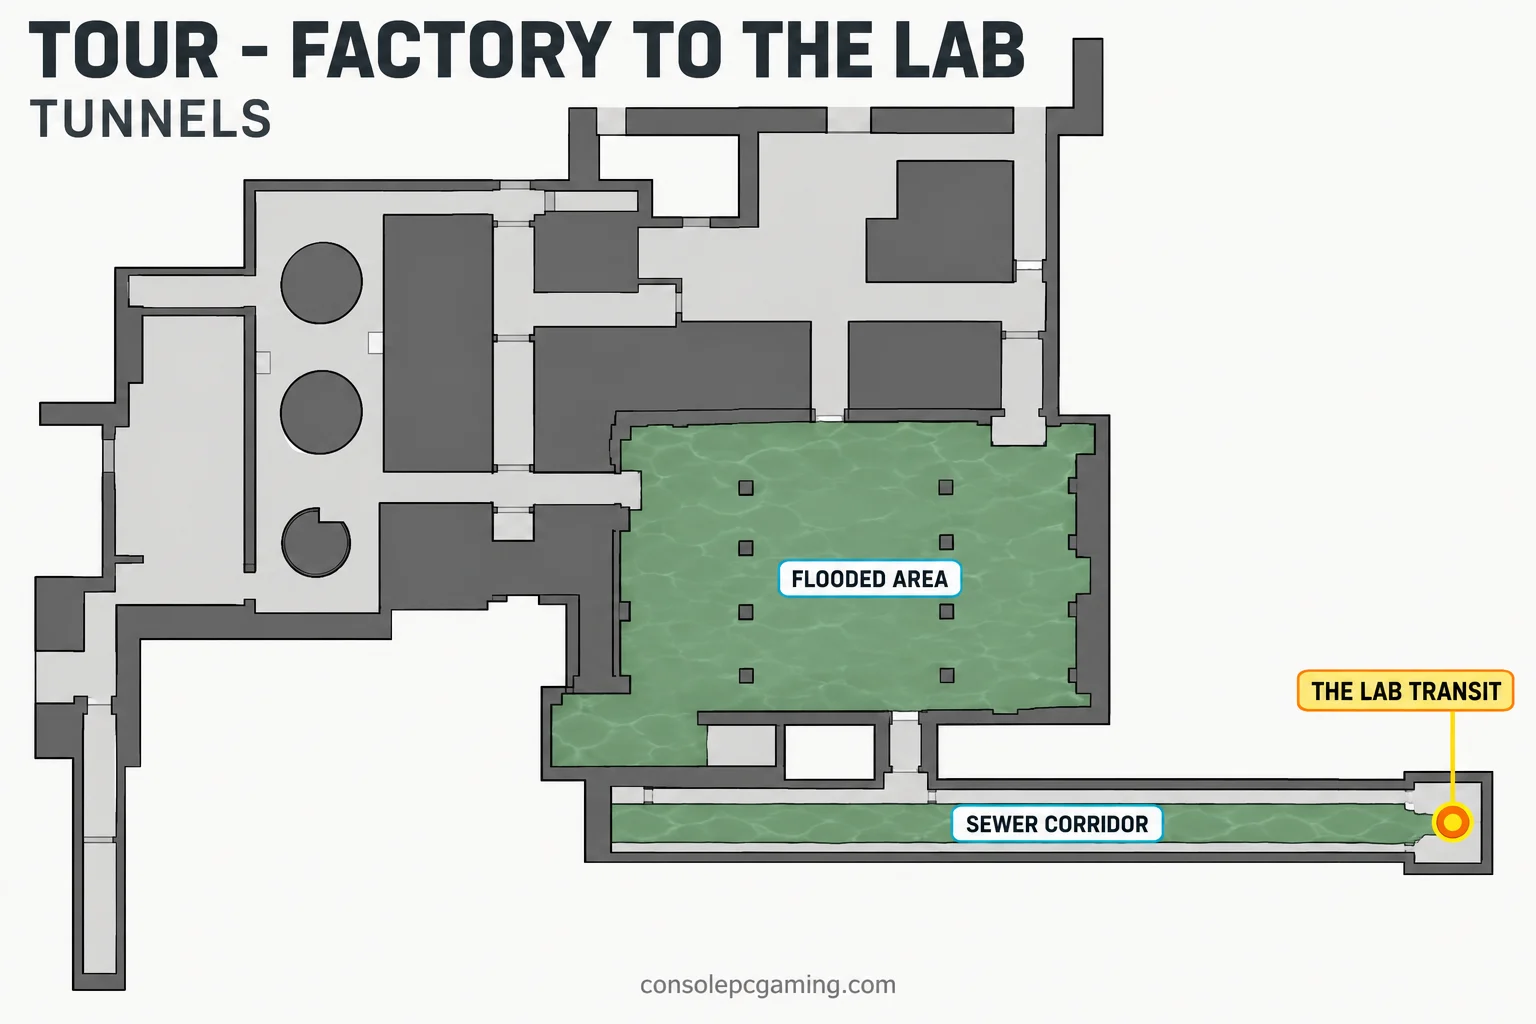
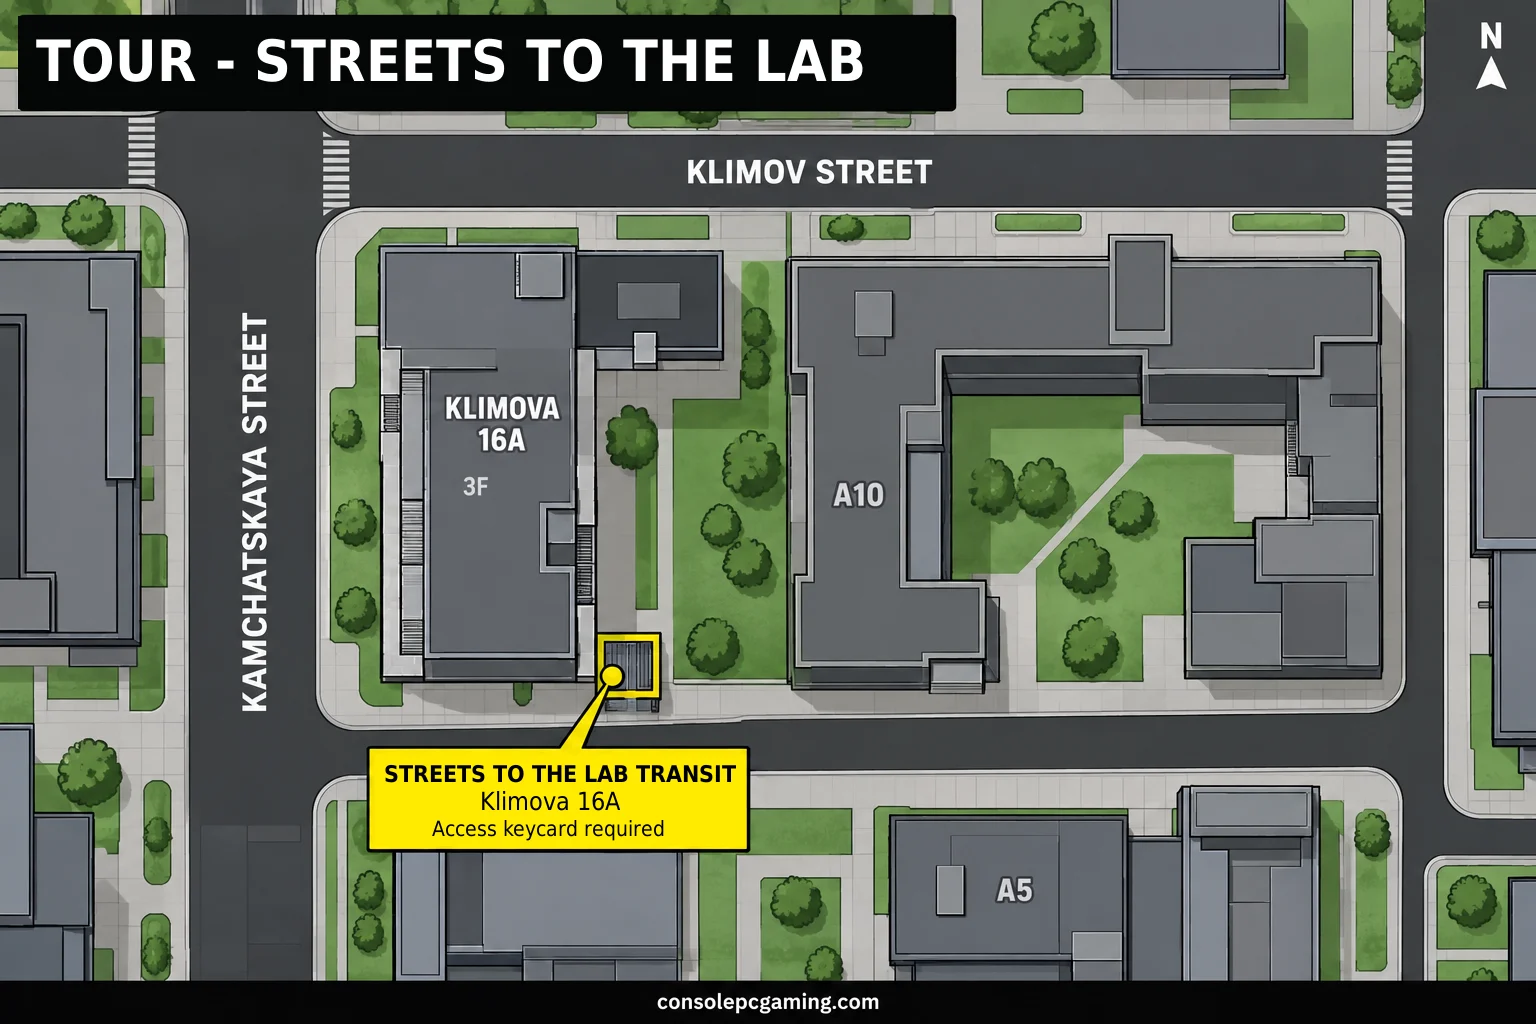
For your first visit to the secret TerraGroup facility, use a transit from Streets of Tarkov or Factory. Bring a TerraGroup Labs access keycard for either of these routes.
- Streets of Tarkov. Find the underground entrance in front of the Klimova 16A building with the cosmonaut mural.
- Factory. Go into the underground sewer tunnel connected to the flooded area and find the transit into The Lab.
Transits become available one minute after the raid begins. You only need to use one of these entrances to reach The Lab; locating both entrances is optional.
Find the three areas inside The Lab
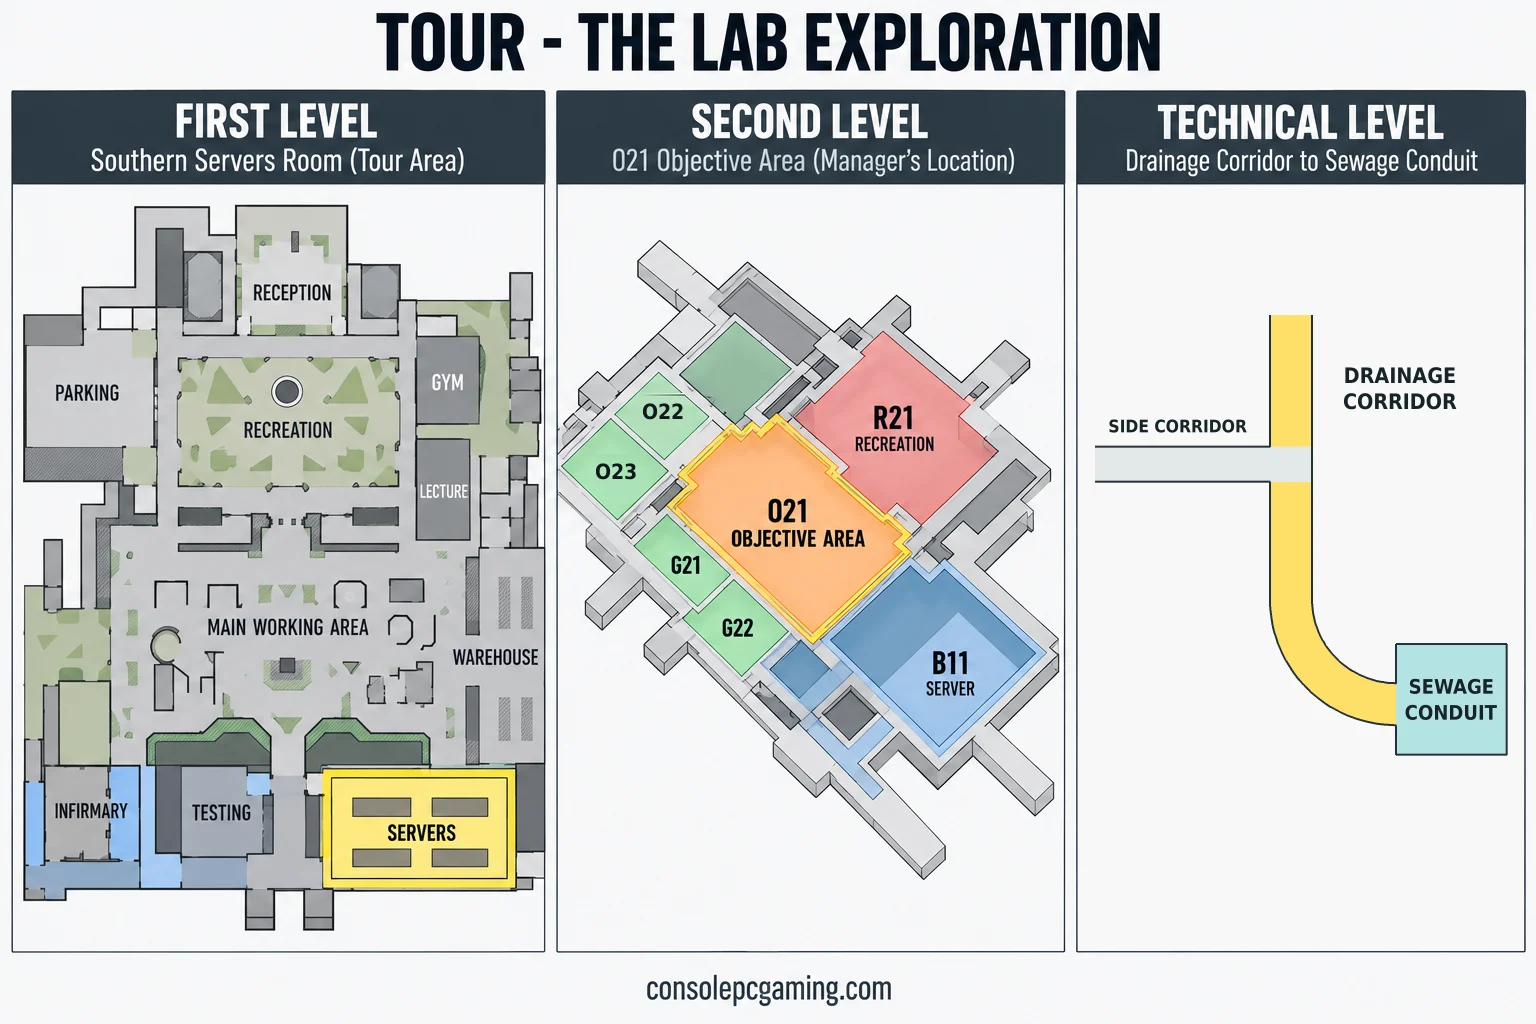
Once inside, you have three exploration objectives to finish.
- Top management offices. Head to the laboratory manager’s office area, O21, on the second level.
- Server room. Find the server area beside the hangar on the first level.
- Drainage escape path. Go down to the basement and approach the Sewage Conduit extraction route.
You do not need to activate the Sewage Conduit extraction to register the drainage objective. This final exploration section also does not require you to survive the raid, so check the objective notifications as you reach each area rather than assuming a death erased every visit.
Tour unlocks and what comes next
Tour opens up the main traders and locations through its individual stages. Finishing the Lab section unlocks The Lab in the location selection and the Pathfinder achievement.
The next main story investigation is Falling Skies. Its armored-case decision matters later, so read the consequences before handing that case to Prapor.
Escape from Tarkov
Developed by Battlestate Games