Are you tired of choppy gameplay and laggy performance in CS2? As we’re heading closer to its official release, this is becoming quite the topic. Well, I guess you’re in the right place! After countless hours of tweaking to get the best performance, I may have found the sweet spot. This guide will walk you through the ultimate video settings for the best competitive experience.
Video settings are extremely important, especially when the new product needs further polishing. Hopefully, this guide will help you elevate your Counter-Strike 2 gameplay and give you the edge over your opponents ahead of the full release.
CS2 In-Game Settings
Audio Settings
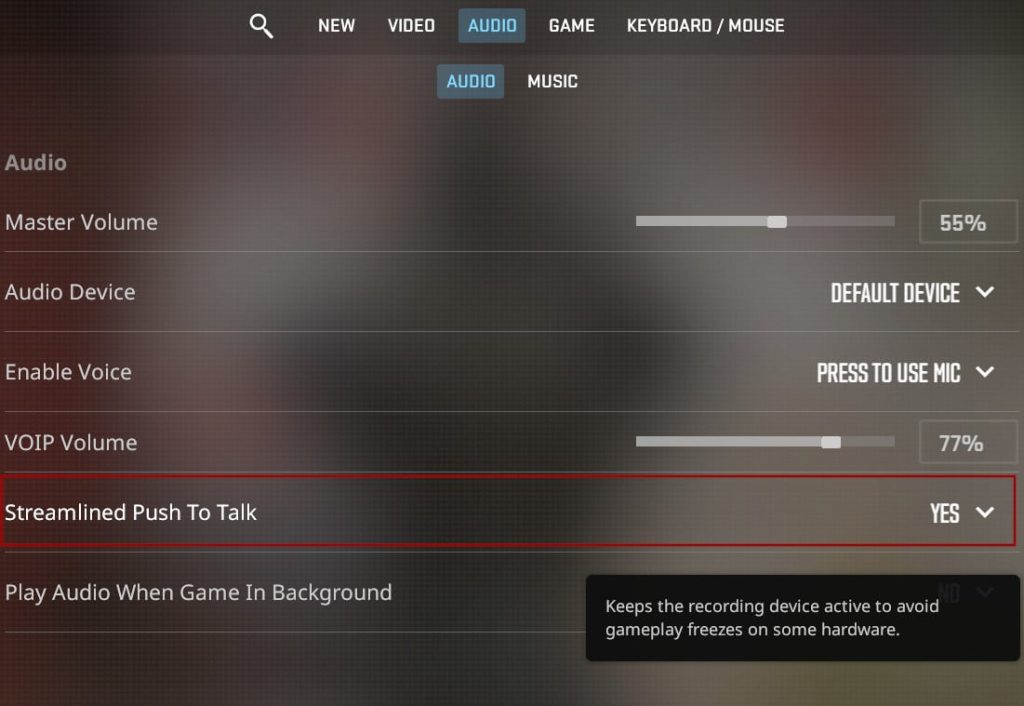
It’s very important to ensure Streamlined Push to Talk is set to YES because it comes as NO by default. Check image:
Basic Video Settings
- Display Mode: Fullscreen
- Maximizes performance and offers the best latency.
- Refresh Rate: Match your monitor’s refresh rate
- Ensures smoother animations.
- Resolution: Personal choice (4:3 stretch, etc.) If you want to play on 4:3 stretch, go to Nvidia’s Control Panel -> Adjust Desktop Size and Position and select Full Screen.
- Affects the field of view and frame rate. Choose based on personal preference.
- Color Mode: Computer Monitor
- Offers more vibrant and accurate colors compared to Television mode.
Advanced Video Settings
- Boost Player Contrast: Enabled
- Improves visibility of players in various lighting conditions.
- Wait for Vertical Sync: Disabled
- Removes input lag but can result in screen tearing.
- Multisampling Anti-Aliasing Mode: 4x or 8x MSAA
- Improves graphics but can be demanding on your GPU.
- Global Shadow Quality: Low
- Allows you to see player shadows more clearly, enhancing gameplay.
- Model/Texture Detail: Low
- Eases the load on your GPU without significantly affecting gameplay.
- Shader Detail: Low
- Provides more detailed visuals but may affect performance.
- Particle Detail: Low
- Can make it easier to see through smokes in some situations.
- Ambient Occlusion: Off
- May cause unwanted shadows, reducing clarity.
- High Dynamic Range: Quality
- Offers better lighting but may cause flickering.
- FidelityFX Super Resolution: Disabled
- Increases resolution but can affect performance.
- Nvidia Reflex Low Latency: Disabled
- Reduces input lag, providing a more responsive experience.
Nvidia Control Panel Settings
Make sure to tweak the Nvidia Control Panel for additional optimization. Set “Use the Advanced 3D Image Settings” under “Adjust Image Settings with Preview” and follow the guide below for “Manage 3D Settings”:
Manage 3D Settings
- Image Scaling: Off
- Ambient Occlusion: Off
- Anisotropic filtering: Off
- Antialiasing – FXAA: Off
- Antialiasing – Gamma Correction: On
- Antialiasing – Mode: Off
- Antialiasing – Transparency: Off
- Background Application Max Frame Rate: Off
- CUDA – GPUs: All
- DSR – Factors: Off
- DSR – Smoothness: Off
- Low Latency Mode: Ultra
- Max Frame Rate: Off
- Monitor Technology: Fixed Refresh (Disable GSync and FreeSync)
- Multi-Frame Sampled AA (MFAA): Off
- OpenGL GDI compatibility: Auto
- OpenGL rendering GPU: Auto-Select
- Power management Mode: Prefer maximum performance
- Preferred refresh rate: Highest Available
- Shader Cache Size: 10 GB
- Texture Filtering – Anisotropic sample optimization: On
- Texture Filtering – Negative LOD bias: Allow
- Texture Filtering – Quality: High Performance
- Texture Filtering – Trilinear optimization: On
- Threaded Optimization: Auto
- Triple buffering: Off
- Vertical sync: Off
- Virtual Reality pre-rendered frames: 1
- Virtual Reality – Variable Rate Super Sampling: Off
- Vulkan/OpenGL present method: Auto
Windows and Steam Optimization
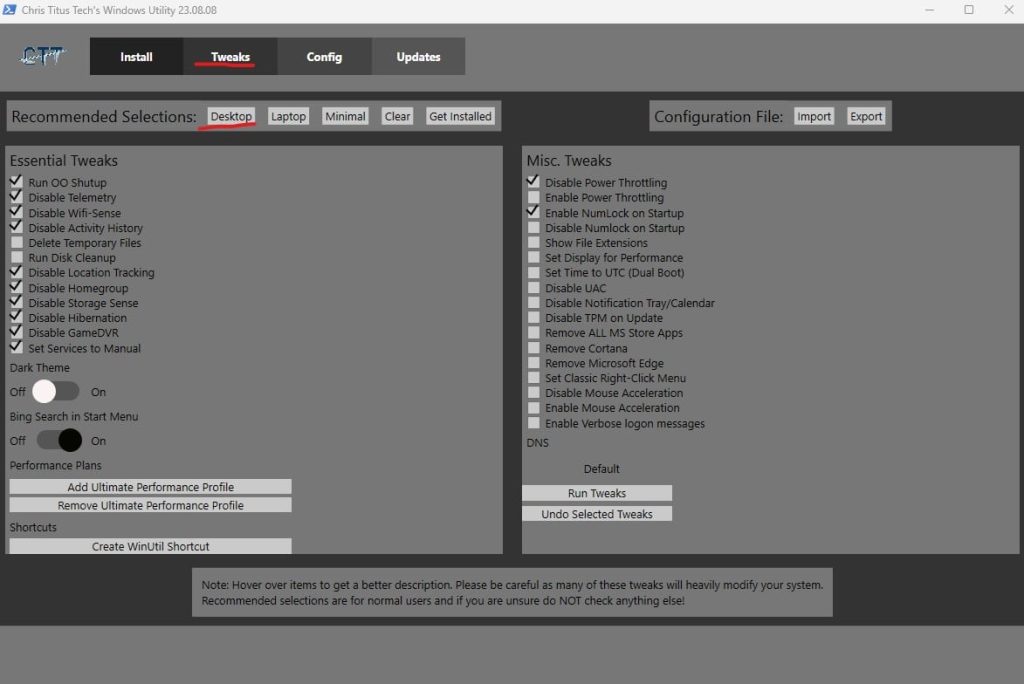
Running Chris Titus Tech’s Windows Utility is highly recommended to squeeze every last ounce of performance out of your system. This utility can adjust your Windows system to optimize it for gaming. Here’s how to run it:
- Open PowerShell: Open your Windows PowerShell as an administrator (you can go to start and type PowerShell, and it will pop up). Once the prompt is up:
- Execute Command: Type the following command and press Enter:
iwr -useb https://christitus.com/win | iex - Run Tweaks: Once the app starts, navigate to the “Tweaks tab” and select “Desktop” at the top of the app.
- Apply Settings: Click on “Run Tweaks.” You should see a message saying “Tasks are Finished” in the PowerShell window once it’s done.
5. Configure your Steam launch options for CS2: -noforcemaccel -novid -tickrate 128 -high -freq 165 -d3d9ex +cl_interp 0.015625 +cl_interp_ratio 1.000000 +cl_forcepreload 1 +fps_max 0 +cl_cmdrate 128 +cl_updaterate 128 +mat_queue_mode 2 (The line above also includes the command to disable mouse acceleration.)
How did this work for you? If you found something valuable or an issue, let us know in the comments below!


