Arena Breakout: Infinite may show a B.D.C. Security Center prompt asking players to enable DMA Guard before they can play. The setting is found in the computer’s BIOS, and the exact name and location depend on the motherboard manufacturer and processor platform. The official Steam configuration guide outlines the required steps for Intel and AMD systems.
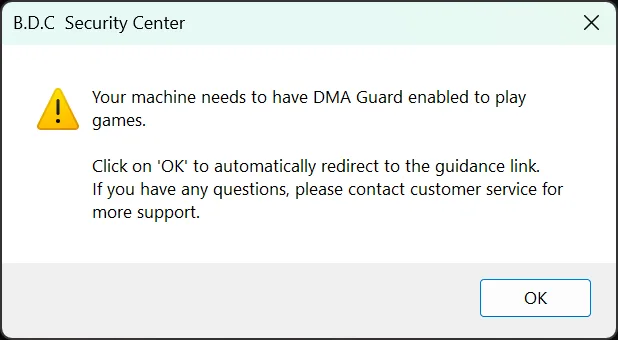
DMA Guard works alongside Windows’ existing Kernel DMA Protection. The system is designed to stop unauthorized external hardware from accessing memory and to limit the kind of low-level access that some cheats can abuse.


Check your motherboard and processor first
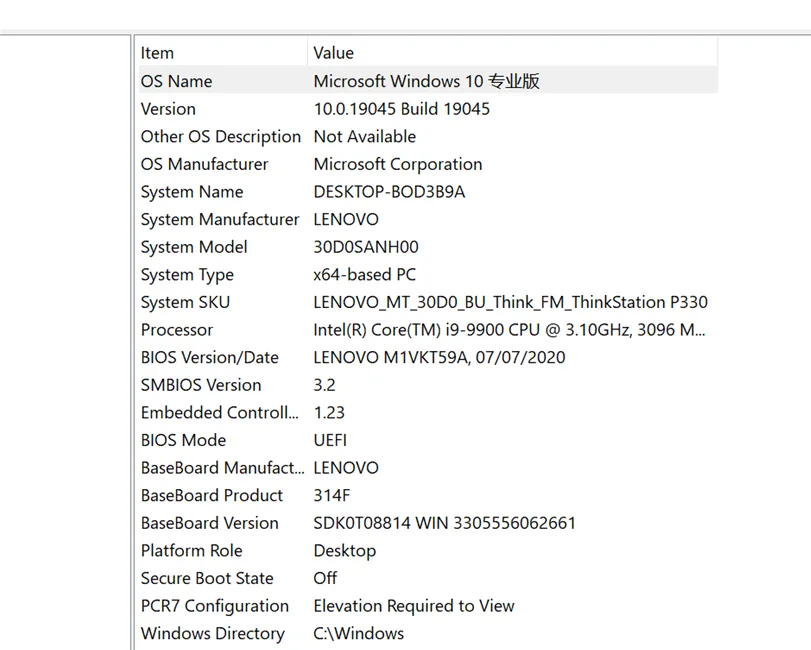
If you are unsure which BIOS menu applies to your PC, Windows can provide the basic hardware details:
- Press Windows Key + R.
- Enter
msinfo32and press Enter. - Check MotherBoard Manufacturer, System Manufacturer, and Processor.
Those entries identify the system maker and whether the computer uses an Intel or AMD processor. The information can also help you find the correct BIOS entry key and menu path.
Enter the BIOS
Restart the computer and repeatedly tap or hold the relevant key as the display turns on, before Windows begins loading. Common keys include:
- ASUS: F2 or DEL
- Gigabyte: F12 or DEL
- MSI: DEL
- HP: F2, F10 on laptops, F12, or ESC on desktops
- Dell: F2, and sometimes F12
- Lenovo: F2 or Fn+F2, with F1 used on ThinkPads
- Acer: F2
- Sony: F2 or Assist on some devices
- Toshiba: F1 or F2 during cold boot
- IBM/ThinkPad: F1 during cold boot
BIOS layouts and entry keys can differ between models, even within the same brand. If these keys do not work, check the motherboard or computer manufacturer’s support information before changing any settings.
Enable VT-d or IOMMU
Intel systems generally use VT-d, short for Virtualization Technology for Directed I/O. AMD systems use IOMMU, or Input-Output Memory Management Unit. Find the matching menu below and set the feature to Enabled.
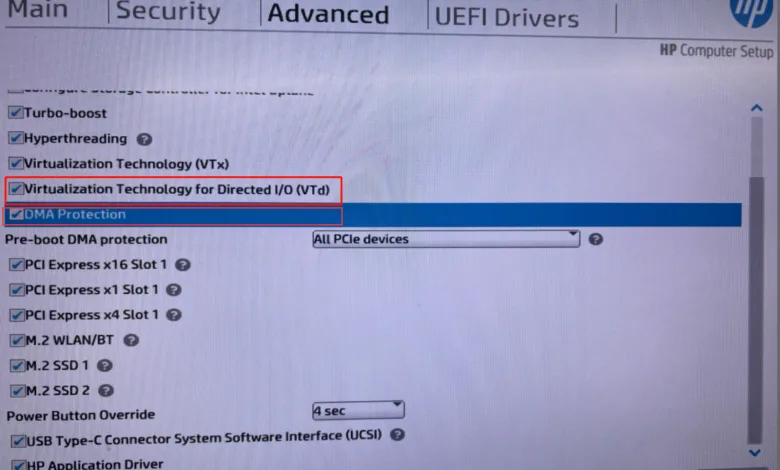
HP systems with Intel processors
Open Advanced, then check VT-d and DMA Protection.
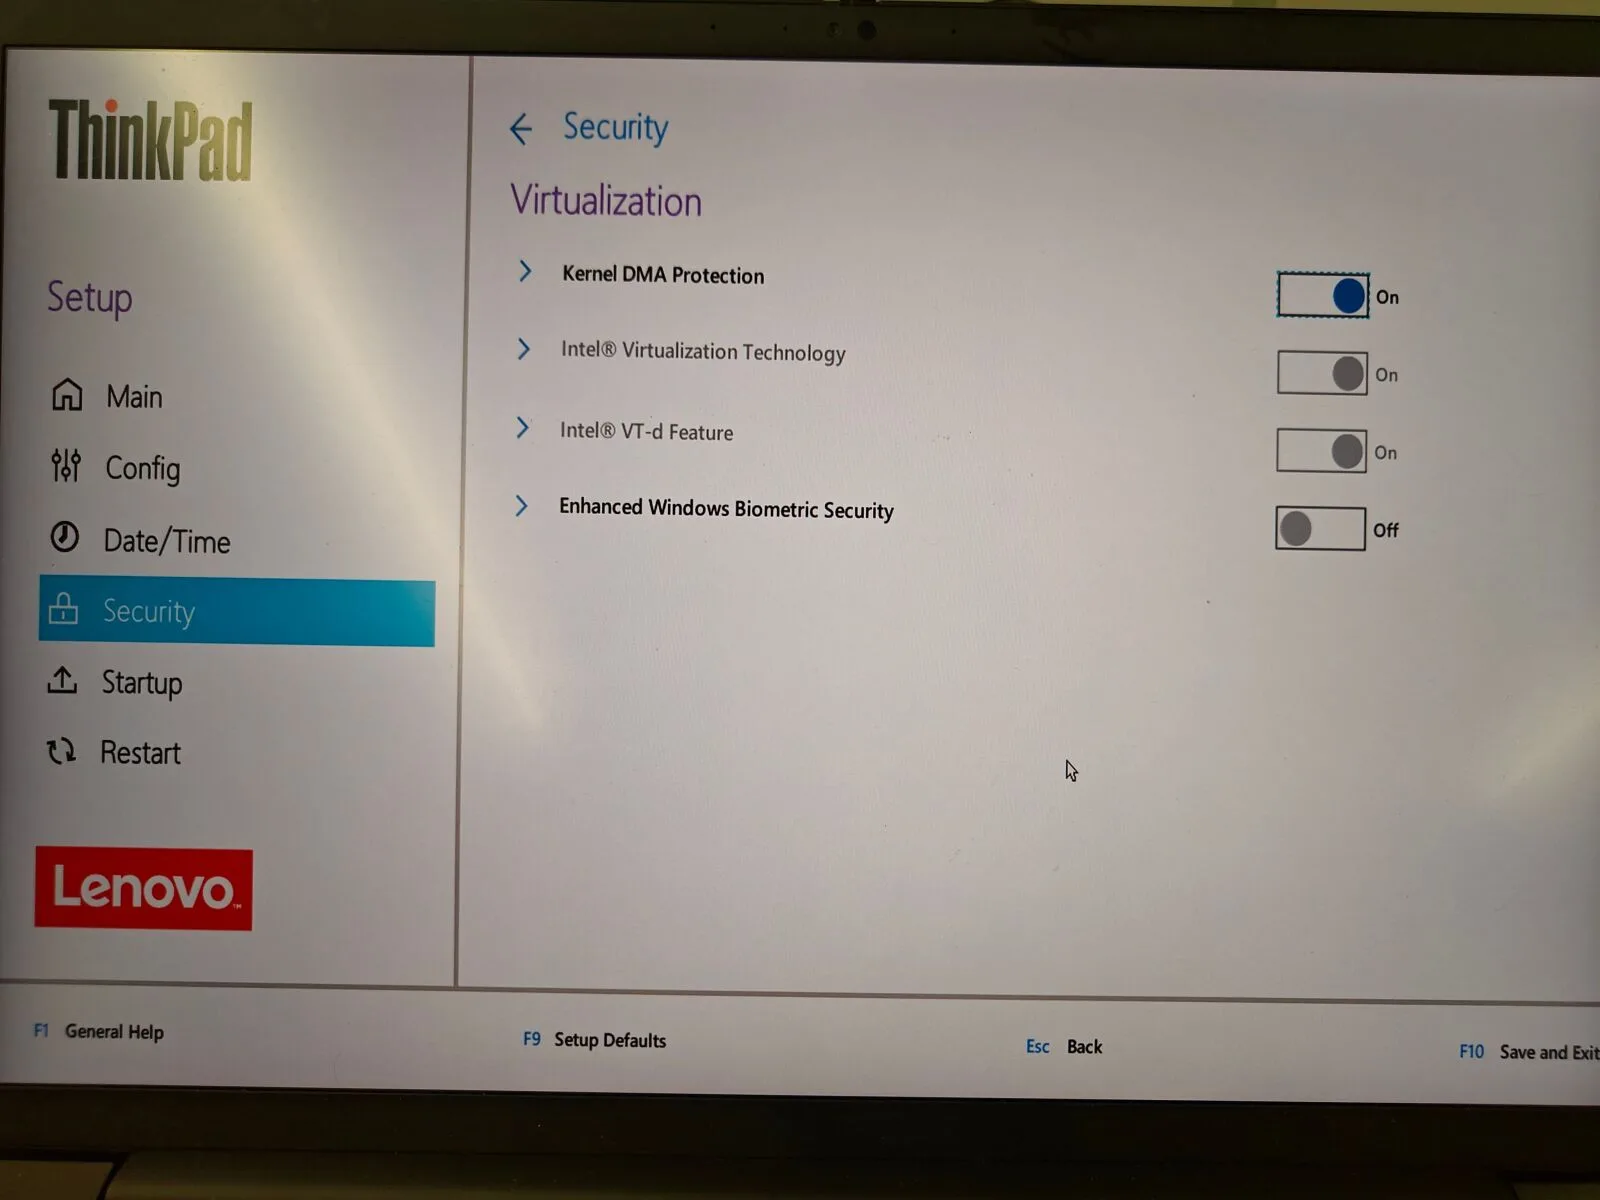
Lenovo systems with Intel processors
Go to Security -> Virtualization, then check Intel VT-d Feature and Kernel DMA Protection.
ASUS systems with AMD processors
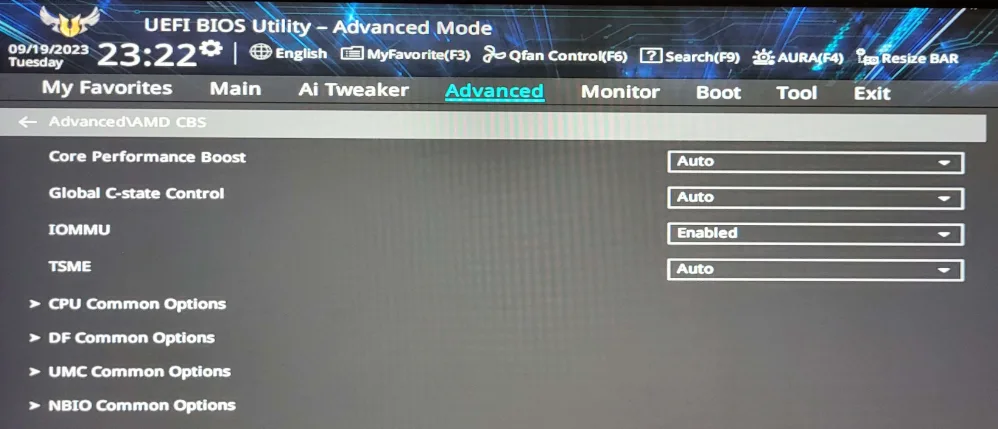
Open Advanced -> AMD_CBS and set IOMMU to Enabled. If the options are present, also check DMA Protection and DMAr Support under NBIO Common Options.
ASUS systems with Intel processors
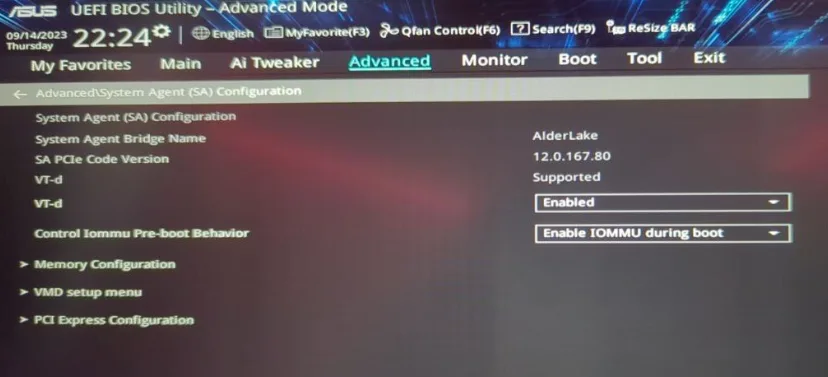
Go to Advanced -> System Agent (SA) Configuration and set VT-d to Enabled. The guide also recommends setting Control IOMMU Pre-boot Behavior to Enable IOMMU during boot.
MSI systems with AMD processors
Open Overclocking -> Advanced CPU Configuration -> AMD CBS and set IOMMU to Enabled. If available, check DMA Protection and DMAr Support as well.
MSI systems with Intel processors
Go to Overclocking -> CPU Features and set Intel VT-D Tech to Enabled. Set Control IOMMU Pre-boot Behavior to Enable IOMMU during boot when that option is available.
Why DMA Guard may appear
The security system treats the BIOS change as a preventative measure rather than proof that an account has cheated. The notice says DMA Guard may be requested when an account shows possible signs of an abnormal login environment or other security risk, including changes involving historical login devices or network conditions.
It also recommends limiting account sharing, changing the password promptly when needed, and avoiding frequent network environment changes. Players should avoid changing unrelated BIOS settings, and anyone who cannot find the required option should contact the computer or motherboard manufacturer for model-specific support.
If DMA Guard has appeared on your PC, tell us whether these BIOS steps solved the problem in the comments, and follow us on X, Bluesky, YouTube, and Instagram.